Have you ever had that sinking feeling when your iPhone slips and the screen cracks? It’s a scary moment, but there’s hope. This guide: “iphone cracked screen solutions” will show you how to fix your iPhone’s screen. You’ll be back to enjoying your phone in no time.
Table of Contents
Key Takeaways
- Apple offers genuine screen repair services using their own high-quality displays
- Pricing for iPhone screen repairs can vary depending on the service provider
- AppleCare+ provides coverage for accidental damage, including cracked screens
- The Apple Limited Warranty covers manufacturing defects for one year
- Genuine replacement parts come with a 90-day warranty or the remaining AppleCare plan
Understanding iPhone Screen Damage Types
iPhone screens have many layers, like Gorilla Glass and OLED or LCD panels. These screens are tough but can still get damaged. Each damage type has its own problems and solutions.
Cracked Glass and Surface Damage
Scratches are common on iPhone screens from daily use. Cracks and shattered glass happen from drops or impacts. These issues can be dangerous and make the screen hard to use.
Internal Display Issues and Malfunctions
Newer iPhones with OLED screens might show lines, dead pixels, or flickering. Older iPhones with LCD screens can have backlight problems. These issues can ruin the screen’s look and function.
Digitizer and Touch Response Problems
The digitizer helps the screen respond to touch. Damage or water can mess with this, making the screen hard to use. Knowing if your screen is incell or oncell helps understand the quality.
Knowing about iPhone screen damage helps fix problems quickly. The right fix keeps your phone working well and looking good.
| Damage Type | Symptoms | Common Causes |
|---|---|---|
| Cracked Glass | Visible cracks, fissures, or shattered glass | Accidental drops, impacts, pressure damage |
| OLED Display Issues | Lines, dead pixels, image retention, discoloration, flickering | Physical damage, manufacturing defects |
| LCD Backlighting Issues | Uneven backlighting, “LCD bleeding” | Physical damage, manufacturing defects |
| Digitizer Malfunctions | Touch screen sensitivity issues | Physical damage, water exposure |
Initial Assessment of Your Damaged iPhone Screen
First, check how badly your iPhone’s screen is damaged. Look for cracks, display problems, and touch issues. Knowing your iPhone model and screen type (OLED or LCD) helps choose the right fix.
Check the screen for cracks or damage. If it’s just the glass that’s broken, you might only need a new screen. But, if the inside parts are damaged, fixing it could be harder.
Make sure the screen works right. If it doesn’t, the problem might be with the digitizer. This part handles touch input, so fixing it might take more work.
| Screen Damage Type | Repair Considerations |
|---|---|
| Cracked Glass | Typically a straightforward screen replacement |
| Display Malfunctions | Potential internal component issues, may require more extensive repair |
| Digitizer Problems | Touchscreen responsiveness issues, may involve digitizer replacement |
Doing a detailed check first helps you understand the damage. This way, you can pick the best iPhone screen damage assessment and evaluating cracked iPhone screen repair.
iPhone Cracked Screen Solutions
When your iPhone screen gets cracked, you have several ways to fix it. You can choose from professional repair services, DIY fixes, or temporary solutions. Each option has its own benefits and drawbacks. Knowing your iPhone cracked screen repair options helps you pick the best one for you.
Professional Repair Services
Going to a professional repair service means your iPhone is in good hands. Companies like Cellairis are leaders in mobile repair. They offer fast service and a great warranty on their work.
Their techs can fix your iPhone screen repairs in under an hour. Plus, they have the best warranty in the business.
DIY Repair Options
If you’re handy with tech, fixing your iPhone screen yourself can save money. Apple’s Self Service Repair program gives you the tools and guides you need. But, DIY repairs come with risks and might not last long.
Temporary Fix Methods
For a quick fix, you can use screen protectors or clear tape. These can keep your screen safe until you get a proper repair. But, they’re not a permanent solution.
When picking a iPhone cracked screen repair option, think about cost, skill level, and warranties. Professional services are pricier but offer quality and peace of mind. DIY repairs can be cheaper but need caution. Temporary fixes are quick but not permanent. Choose what fits your needs and skills best.
| Repair Option | Pros | Cons |
|---|---|---|
| Professional Repair Services |
|
|
| DIY Repair Options |
|
|
| Temporary Fix Methods |
|
|
Apple’s Self Service Repair Program Overview
Apple’s Self Service Repair program is a big deal for iPhone owners. It lets you handle your device’s upkeep yourself. You get real Apple parts, top-notch tools, and detailed repair guides. This means you can fix your iPhone 12, 13 series, and the latest iPhone SE on your own.
Getting started is easy. First, download the repair manual for your specific fix. It tells you what you need and how to do it. Then, buy the parts and tools from the Self Service Repair Store. Once you have everything, you can fix your iPhone using Apple’s genuine parts.
Apple’s program makes sure your repair is safe and reliable. It offers:
- Genuine Apple parts for your iPhone model, ensuring quality and safety.
- Professional tools for reliable repairs.
- Step-by-step repair manuals to avoid mistakes.
- The chance to rent a tool kit for $49 instead of buying it.
- Part recycling for responsible disposal, with possible credit for repairs.
After fixing your iPhone, you might need to run some tools. This ensures your device works right. With Apple’s program, you can manage your iPhone’s upkeep. You save time and money, knowing you’re using real Apple parts and tools.
| Feature | Details |
|---|---|
| Genuine Apple Parts | Designed and tested for quality, safety, and reliability |
| Professional-grade Tools | Built to endure daily high-volume use |
| Repair Manuals | Detailed guides for each repair type |
| Tool Rental | $49 for a weeklong rental, with free shipping |
| Part Recycling | Return used or damaged parts for responsible recycling or refurbishing |
Apple’s Self Service Repair program is a game-changer for iPhone owners. It gives you control over your device’s maintenance. With access to genuine parts, tools, and guides, you can ensure your iPhone lasts longer and works better.
Cost Comparison: Professional vs. DIY Repairs
Fixing a cracked or damaged iPhone screen has two main options: professional repair or DIY. The prices for these choices can differ a lot. It’s key to know the differences to make a smart choice.
Service Center Pricing
Apple’s official repair services for iPhone screens cost between $109 and $429. This depends on the model and damage level. Third-party shops might charge less, from $50 to $300+. But, they might use non-genuine parts, which could harm the screen’s performance and life.
Self-Repair Equipment Costs
DIY repairs can save money, with tools and parts costing $20 to $250+. Apple’s Self Service Repair program lets you rent a kit for $49 a week. You’ll need a $1,200 hold on your credit card. DIY repairs need tech skills and might risk damaging your phone more.
Long-term Value Considerations
Looking at the long-term value is crucial. Professional repairs usually come with warranties. This ensures your device works well after repair. DIY repairs might void your warranty and could cause more problems later.
Choosing between professional and DIY repair depends on your skills, budget, and warranty concerns. Think about the costs and risks before deciding what’s best for you.
Essential Tools for iPhone Screen Repair
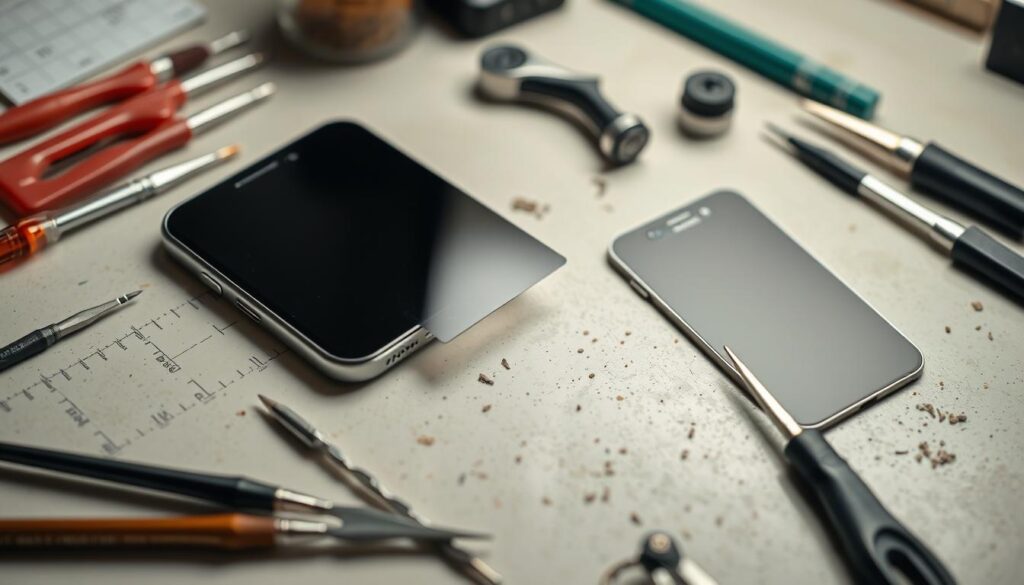
DIY iPhone screen repair needs the right tools for success and safety. You’ll need screwdrivers, suction cups, pry tools, adhesive, and a display press.
A basic kit for fixing phones has many tools. You’ll find flathead, pentalobe, and Phillips screwdrivers, metal tweezers, and more. These help you take apart the iPhone and get to the display.
For tougher repairs, Apple’s kit has special tools. The Universal Display Removal tool and a display press make screen replacement easier and safer.
It’s smart to have extra supplies ready:
- Safety goggles to protect your eyes
- Cut-resistant gloves to avoid cuts
- An ESD wrist strap to prevent damage from static
Choosing quality tools is key, not just the cheapest ones. Bad tools can harm your phone. Look for tools with good reviews and from trusted brands for a safe fix.
| Tool | Purpose |
|---|---|
| Screwdrivers (Pentalobe, Phillips) | Disassembling the iPhone to access the screen |
| Suction Cup | Removing the front and back panels of the iPhone |
| Pry Tools | Carefully separating the display and other components without causing damage |
| Adhesive Strips | Securing the replacement display assembly during reassembly |
| Display Press | Applying the appropriate pressure to ensure a proper seal for the new display |
With the right iPhone screen repair tools and the right steps, you can fix your screen yourself. This saves you money compared to professional services.
Safety Precautions Before Starting Repairs
Before starting your DIY iPhone screen replacement or any repair, safety is key. Make sure your workspace is clean and well-lit. Wear the right gear to avoid accidents and ensure a good repair.
Workspace Preparation
Keep your work area tidy and free of clutter. Don’t repair your iPhone in damp places to avoid short circuits. Also, take steps to prevent electrostatic discharge (ESD) to protect your iPhone’s sensitive parts.
Personal Protection Equipment
- Wear cut-resistant gloves to protect your hands from sharp edges or broken glass.
- Use safety goggles to shield your eyes from debris or fragments.
- Make sure you have good ventilation when working with adhesives or solvents to avoid inhaling fumes.
Always read and follow the repair manual carefully. This will help you avoid damaging your iPhone. By taking these safety steps, you’ll protect yourself and ensure a successful DIY iPhone screen replacement or repair.
“Using damaged cables or chargers, or charging when moisture is present, can cause fire, electric shock, injury, or damage to iPhone or other property.”
Step-by-Step Screen Removal Process
Replacing a cracked or damaged iPhone screen is a delicate task. But, with the right tools and precautions, many users can do it themselves. The first step is to carefully remove the existing screen. Let’s go through the steps to safely detach your iPhone’s display.
- Power off your iPhone and discharge the battery to avoid electrical shocks.
- Use a small pentalobe screwdriver to remove the two screws at the bottom, near the charging port.
- Apply a small amount of heat, from a heat gun or hairdryer, to the bottom edge. This loosens the adhesive.
- Put a suction cup on the display’s center and pull up slowly. You might need to do this a few times.
- Use a plastic pry tool to slide along the bottom edge. This loosens the adhesive further.
- Disconnect the ribbon-like connectors from the internal components. Be careful not to damage them.
- Remove the metal connector shield and unscrew the screws holding the earpiece, home button, and speaker assemblies.
- Lift the screen carefully, making sure all components are disconnected before removing the display.
The how to remove iPhone screen process is delicate. Take your time and work carefully to avoid damaging any parts. With the right iPhone screen replacement steps and tools, you can safely remove the screen and get ready for the new display.
Remember, your iPhone’s water-resistance may be lost once it’s disassembled. So, be careful when handling the phone during the repair.
Installing the New iPhone Display
Replacing your iPhone screen is a careful process. First, remove the old screen safely. Then, follow this guide to install the new one correctly.
Adhesive Application
Clean your iPhone’s frame well before applying the new screen. Use a lint-free cloth to remove dust. Then, put a small amount of adhesive on the frame’s edges.
Cable Connection Guidelines
Connect the display cables to your iPhone. Make sure they fit right and click into place. Check all connections to avoid problems later.
Place the new screen on the frame, making sure it’s aligned. Use a display press to hold it in place. Tighten the screws to secure it.
Test your iPhone’s touch, fingerprint sensor, and other features. With care and patience, you can fix your iPhone’s screen.
System Configuration After Screen Replacement
After replacing your iPhone’s screen, it’s key to set up the system right. This means reaching out to Apple support or using special tools to adjust settings and components. This process helps your iPhone work like new again.
Replacing the screen can also mess with Face ID. This happens because the TrueDepth camera and the System on Chip processor need to talk securely. But, if you use parts that aren’t genuine, Face ID might not work.
- Updating your iPhone to the latest iOS can fix some issues, like True Tone. But, it might not solve the Face ID problem.
- Apple’s strict security and complex hardware-software mix make fixing Face ID with fake parts hard.
- Even real Apple parts from stolen phones can cause problems because of the Activation Lock. This adds to the setup hassle.
To make sure your iPhone works well after the repair, talk to Apple Support or an authorized service. They can help you set up your iPhone right. This way, you’ll get back all its features and functions.
| Issue | Occurrence Rate | Potential Causes |
|---|---|---|
| Face ID Failure | 80% | Secure communication breakdown, non-genuine parts |
| True Tone Malfunction | 55% | Software calibration errors, hardware incompatibility |
| Touch Response Problems | 45% | Cable damage, pressure-related LCD issues |
By tackling these common issues and following the right steps, you can make sure your iPhone works perfectly after a screen swap. This way, you’ll get back all its features and functions.
Common Mistakes to Avoid During Repair
Fixing an iPhone screen can be tricky, even for those who have done it before. It’s important to avoid mistakes that can damage your phone more. By knowing these common errors, you can fix your screen without wasting time or money.
One big mistake is using too much force when taking apart your iPhone. The inside parts are very delicate and can break easily. Be gentle and take your time to avoid damaging cables or connectors.
- Carefully organize the removed screws and components to ensure proper reassembly.
- Follow the repair manual closely and consult online guides to understand the specific steps for your iPhone model.
- Utilize the proper tools designed for iPhone repairs, such as a precision screwdriver set and a suction cup for removing the display.
Another mistake is not using the right amount of adhesive when putting the new screen back on. Too much or too little can cause the screen to lift or not work right. Make sure to follow the adhesive instructions carefully or ask a pro for help.
Don’t rush the repair job. Take your time and check your work carefully. Missing small screws or losing parts can make putting everything back together very hard. This could even make your iPhone not work at all.
“Patience and attention to detail are key when tackling an iPhone screen repair. Rushing through the process is a surefire way to end up with a non-functioning device.”
By avoiding these common mistakes, you can fix your iPhone screen yourself and keep it working well. Always be careful, follow the instructions well, and ask for help if you’re not sure about something.
Warranty Considerations and AppleCare Coverage
Understanding your warranty options is key when fixing an iPhone with a cracked screen. Apple’s standard warranty lasts up to one year from purchase. But, the length can change based on where you are. The AppleCare+ plan can extend your warranty and add extra benefits.
AppleCare+ Benefits
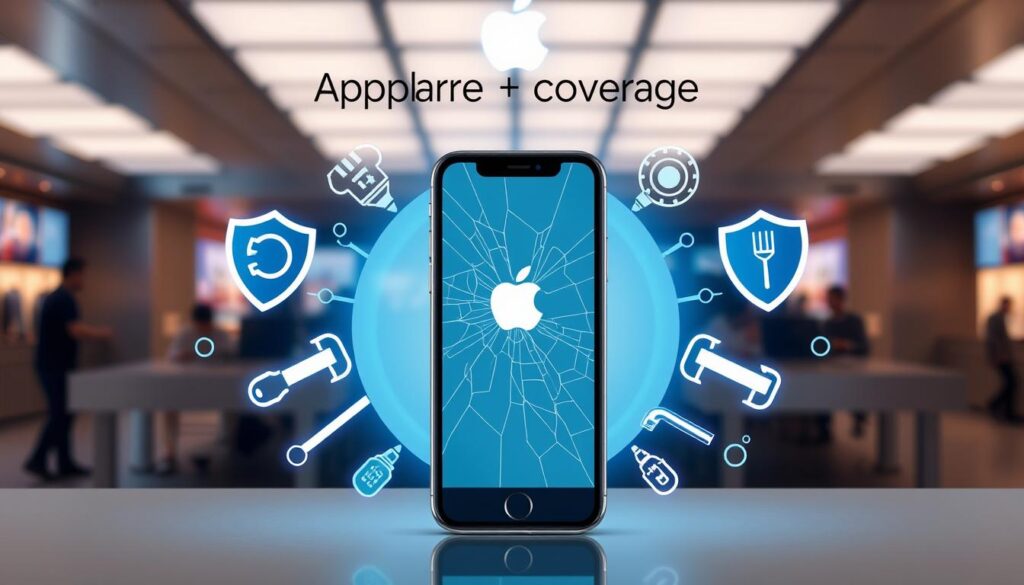
AppleCare+ adds two more years to your iPhone’s warranty. It offers technical support and covers hardware, including accidental damage. You get priority help from Apple experts and can get your Apple TV protected too.
This plan includes a free repair for key parts like the battery and screen. It also offers free replacement equipment. With AppleCare+, you can get your screen or battery fixed for free. Plus, it covers credit card replacement for secure transactions.
Warranty Validation Process
The standard Apple warranty doesn’t cover damage from accidents, like a cracked screen from a drop. It also doesn’t cover repairs by third-party shops. To keep your warranty valid, have repairs done by Apple or through their self-service program.
Before fixing your iPhone, check its warranty status. Visit Apple’s website or call their support. Knowing your warranty details helps you decide the best fix for your screen.
Prevention Tips for Future Screen Damage
Keeping your iPhone’s screen safe is key to avoiding repair costs. By being proactive, you can prevent iPhone screen cracks and keep your device looking great. Here are some important iPhone screen protection tips:
- Use High-Quality Screen Protectors: Invest in tempered glass or premium plastic screen protectors to safeguard your iPhone’s display from scratches, cracks, and shattering.
- Employ Protective Cases: Opt for sturdy, well-designed cases that provide ample cushioning and edge protection for your iPhone, reducing the impact of potential drops or bumps.
- Avoid Extreme Temperatures: Exposure to extreme heat or cold can weaken the screen’s structural integrity, so be mindful of your iPhone’s environment.
- Handle with Care: Refrain from placing your iPhone in pockets with keys or other sharp objects, and be cautious when setting it down on uneven surfaces.
- Consider AppleCare+: Enrolling in AppleCare+ can provide valuable coverage against accidental damage, offering peace of mind and affordable screen replacement options.
By following these iPhone screen protection tips, you can greatly prevent iPhone screen cracks. This will help keep your device in top shape for longer. Remember, a bit of care now can save you a lot of trouble later.
“A cracked screen can be a frustrating and costly problem, but with the right precautions, you can keep your iPhone looking and functioning like new for years to come.”
When to Choose Professional Repair Over DIY
DIY iPhone screen repair can save money for small issues. But, for complex problems, water damage, or if you’re not tech-savvy, professional help is better. Certified technicians have the skills and tools needed for a proper fix.
Professional repair uses genuine parts and specialized tools. This ensures your iPhone works well for a long time. Plus, it keeps your warranty intact, offering extra protection. This is crucial for newer iPhones, like the iPhone 13 Pro Max, where repairs can cost up to £316.44 if not covered by warranty.
Time and safety are also important. Professional repairs are quicker, so your device is back in use sooner. Think about the repair costs, your skills, and the damage’s complexity. Decide if a pro repair or DIY is best for you.
FAQ
Can you use an iPhone with a cracked screen?
What are the different types of iPhone screen damage?
How do I assess the extent of my iPhone’s screen damage?
What are the options for repairing a cracked iPhone screen?
What is Apple’s Self Service Repair program?
How much does it cost to fix a cracked iPhone screen?
What tools are needed for an iPhone screen replacement?
How do I safely perform an iPhone screen replacement?
What happens if I make a mistake during the iPhone screen replacement?
Does my iPhone warranty cover a cracked screen?
How can I prevent future iPhone screen damage?
When should I choose professional iPhone screen repair over DIY?
Source Links
- iPhone Screen Repair – Apple Support
- iPhone Repair | Cracked Screen Repair
- A Comprehensive Guide to iPhone Screen Repair for Everyone | Gophermods
- Types of iPhone Screen Damage – GadgetFix
- What Causes iPhone Screen Cracks and How to Prevent Them – Repair Services | Cell Phone Repair Expert
- Decoding the iPhone Repair Process: Understanding What Happens to Your Device | Phonebulance | Emergency iPhone Repair Center
- iPhone Repair 4 Less
- How iPhone Screen Damage Can Escalate | iPhone Ambulance
- iPhone Repair and Service – Apple Support
- Cellairis Mobile Cases and Accessories
- Affordable iPhone Screen Repair – Cost and Solutions
- Self Service Repair – Apple Support
- I Fixed My Broken iPhone Screen Using Apple’s Self Service Repair Kit
- Apple’s Self Service Repair now available
- Cost Analysis of DIY vs. Professional iPhone 12 Pro Screen Repairs
- | Phone Repair, iPhone, iPad, and Computer
- iPhone Repair Kits: Everything You Need For DIY Phone Repairs | Fresno
- | Phone Repair, iPhone, iPad, and Computer
- Essential Tools and Materials for iPhone Screen Repairs
- Important safety information for iPhone
- iPhone Repair Safety Precautions
- How to Fix an iPhone Screen (with Pictures) – wikiHow
- Step-by-Step Tutorial: Replacing Your iPhone Screen at Home
- Ultimate Guide to Fixing a Cracked iPhone Screen Yourself (or Knowing When to Call a Pro)
- Third party screen on new iphone
- Cellairis Mobile Cases and Accessories
- How to Replace a Shattered IPhone Screen
- iPhone parts and service unable to config…
- I Changed My iPhone Screen And Now I See Something Like
- Top 5 Myths To Get Your iPhone Repair Working Like New Again
- Cracked Screen Repair? 5 Tips to Fix a Cracked Phone Screen by Phone Screen Repair Pros
- | Phone Repair, iPhone, iPad, and Computer
- | Phone Repair, iPhone, iPad, and Computer
- Is AppleCare+ Worth Buying for Your iPhone? – Consumer Reports
- Everything You Should Know about Apple’s One-Year Warranty
- How to fix a cracked phone screen | Asurion
- Preventing Future Screen Damage: Tips for iPhone Users
- Preventing Future Cracks: Best Practices After iPhone 11 Screen Repair
- The Cost-Benefit Analysis of Professional vs. DIY iPhone Screen Replacement
- Evaluating iPhone XR Screen Repair Options: DIY vs. Professional

